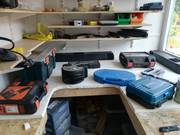
Hi All, well I finally had my very first test run on my layout and am a happy bunny, seeing as I never done this before. I have created a you tube account and uploaded videos of my progress so feel free to pop over and have alook and all comments are very welcome.
https://www.youtube.com/channel/UCWSmzD ... MtkEl2l0zw
I have decided to go with the Dutch Digikeijs system, using a DR5000 as the control, with two DR4018 to control my MTB MP-1 motors for the points, and a DR4088CS for feedback. At present I have laid out the first two mainline tracks in the position I want them and have wired up the first section. Having purchased a loco, I have successfully installed the DCC decoder, and even managed to re write the CV's - all a massive learning curve. Now that I know the system does actually work, I can carry on soldering and installing the rest of the track. A big thank you to all that post here as your expertise and suggestions in the forum have really helped me work this all out.
Lyng and District update
- bulleidboy
- Posts: 2309
- Joined: Thu Oct 04, 2018 6:30 pm
- Location: Basingstoke, Hants
- Contact:
Re: Lyng and District update
That's looking good - I watched the video. It will be great to see how you progress. Once you get started there will be no stopping
Re: Lyng and District update
Video 9 shows you soldering and tinning the wire ends also using Flux in addition to what is in the solder.
Flux used must be sold specifically for electrical work. Never use ordinary flux as sold of plumbing or sheet tin soldering etc as it contains acid and should be washed off with water - this of course cant be done on an electrical joint. Acid will overtime if not washed off eat away at the joint.
My method as learnt in a safety critical industry is...
Apply a fresh lay of solder to the hot irons tip. Which of course must be in first class condition. Place tip on top stripped wire and allow the wire to heat up, then feed cored solder (60/40 type lead content) onto the heated wire until it is seen flowing through the wires.
Rails - Clean surface to be soldered with Emery cloth or ideally a fibre pencil, even on brand new track! Wet soldering iron tip with a fresh wipe of new solder. Apply to rail and feed fresh solder onto rail surface. Remove iron and lay wire onto pre soldered area. Apply iron to melt solder into both items making a very solid joint.
Good series of videos though
Re: Lyng and District update
Thanks for the tip!
Lyng and District https://www.youtube.com/channel/UCWSmzD ... MtkEl2l0zw
Who is online
Users browsing this forum: No registered users and 1 guest