Tha top bridge is mainly made from aluminium, materials have been bought and a start made.
The steel left steel bridge, is half Kibri parts and half scratch build and is being assembled.
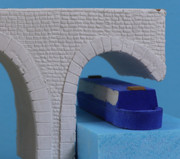
Stone bridge has one side completely covered.
I bought two canal boats from Craftline and am replacing the supplied prints for the sides with my own.I have cobbled together enough photo's to patch them together to use on both boats, but now need to trial and error print and fit to get the right scale!
Checked the clearance and the canal and a tow path will fit under the bridge (I left the end too long to enable integration into the cliff), I was a bit concerned, as the Crafline are broad beam, not narrow boats!
So here are some views of the texture roller bricks. The corner stones are laid on after and grooved. This is the back (unseen side) that serves as the first go, I have yet to tackle the other side. I am not sure I like the corner sides sticking out proud (it was a quick fix to lay DAS on, after the sides had been applied).
I have yet to decide if I can stomach routing out a rebate into the brick after laying the brick, although I could do it by cutting when soft when I lay the bricks on the other side.
Yes I know the bricks ain't very even, but this was a test. Obviously rolling the pattern is good on a flat surface, but moving it to the bridge, inevitably allows stretch and misshaping before it lands! I am not sure that rolling on the bridge won't produce an undulating surface!


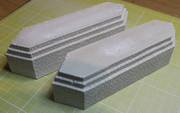
The pillar bases are cast in a hardboard box, holding a gun sealant silicon mould of a Linka master. They turned out well!


