Page 16 of 18
Re: RSR new layout.
Posted: Sun Aug 15, 2021 5:25 pm
by Mountain Goat
I have used all sorts. On an N gauge layout in the past, I had an old track cleaning rubber that was on its last legs so I rubbed it onto the little N gauge sleepers while the glue and ballast was in place and it actually gave it a pleasing finish which was better than I had expected as it toned down the freshness of the balast nicely.
Re: RSR new layout.
Posted: Mon Aug 16, 2021 6:58 pm
by RSR Engineer
Thank you, gentlemen, for these latest tips. I'll bear them in mind.
Cheers,
Artur
Re: RSR new layout.
Posted: Mon Aug 23, 2021 9:38 am
by RSR Engineer
Ballasting work continues. The short piece on the headshunt bridge was photographed after it had dried and I think it looks reasonable. Then came the painting of the track. I acquired an airbrush and some Vallejo acrylic "earth" colours from my local modelshop (who don't have Humbrol!) and got stuck in. The first attempt was to paint the sides of the rails in burnt umber with a brush. I felt I had the paint too thin coz it pooled in the corners beside the chairs and glistened like Chinese lacquer. Once it was dry, all that disappeared, so maybe I was worrying for nothing. But brushing was very tedious, so I think I'll reserve it for the points and awkward little corners where sprayed paint won't go. So onto the airbrush. This is a Revell "Standard Class" jobbie, not very sophisticated but it seems to do the job. Again, it seems the degree of thinning is critical. Moving the airbrush at an even speed and at the right distance is something I have to practice; as the pix on flickr show, I wasn't very successful.
The white underlay will clearly have to be stained with an earth colour at an early stage. I take it I can use ordinary household paint, properly thinned and blended, for this.
As I said before, I welcome your comments on my effort, both positive and negative.
Pix on flickr:
https://www.flickr.com/photos/53775591@ ... 145/page3/
Cheers,
Artur
Re: RSR new layout - ballasting.
Posted: Sun Sep 12, 2021 10:55 pm
by RSR Engineer
If I might prevail on your patience, gentlemen, to tell of my latest adventures with ballasting my track.
The white underlay was trimmed to within 5 mm or so of the ends of the sleepers. This was to allow a nice banked edge to form in the ballast. However, it did cause a different problem, of which more anon. The baseboard and the underlay up to the ends of the sleepers was painted with a mix of watered- down tinting colours (Google translation from German) to give a nice mucky muddy dirt brown. The only white parts still showing were between the sleepers. The sides of the rails were painted by brush with Vallejo burnt umber, which gives a good rust colour.
The ballast material was applied with the Proses dispenser and corrected with finger and brush. One problem that arose was with the rough OSB that was exposed by cutting back the underlay, making it difficult to apply any kind of straight edge to the ballast material. I had to brush the edges as straight as I could, with moderate success. What I think I'll do now is lay down (and paint) a strip of paper with its edge tucked under the underlay to provide a smooth surface for straightening the edge of the ballast. That OSB stuff has proved not to be as paradisical as I expected.
The ballast was wetted as before with diluted glue but I fear I squeezed the bottle to hard and squirted the glue rather than just dribbling it. The pictures on flickr illustrate the results.
https://www.flickr.com/photos/53775591@ ... 4145/page3
As before, I would be grateful for your feedback.
Cheers,
Artur
Re: RSR new layout.
Posted: Mon Sep 13, 2021 8:17 am
by Bandit Mick
Some of the ballasting looks great Artur but one bit looks a bit lumpy - maybe it’s just one particular picture. I like the colours you’ve used. Did you add some washing up liquid when ballasting to break up the surface tension? Ballasting is one of those tedious but needs patience jobs. I’m sure you’ll get there - we all doubt ourselves at times.
Re: RSR new layout.
Posted: Mon Sep 13, 2021 8:59 am
by RSR Engineer
Many thanks for your comments and encouragement, Mick. I did add a few drops of Fairy Liquid to the diluted glue and this helped it to seep in everywhere. The lumpiness was no doubt due to my Hulk-style handling of the glue bottle. The additonal paper edging I mentioned before will be the next experiment. Whether to colour the sleepers I still haven't decided. If so, it'll be another job to do before ballasting. I'm just grateful to have a few temporary and hidden tracks to practise on.
Cheers,
Artur
Re: RSR new layout.
Posted: Mon Sep 13, 2021 10:20 am
by Steve M
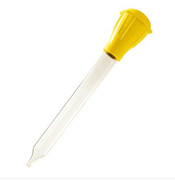
Artur, I would recommend painting the sleepers etc before blasting - painting them individually with the amount of track you have would be impossible imho. You then have the option of adding washes or airbrushing the ballast after it's been laid.
I used a large eye dropper when I did my most recent blasting - very time consuming but necessary as I have many points and needed fine control do I didn't get glue in the wrong places. For areas with no points, I have used a chicken baster in the past. They have a large capacity but the flow is still controllable. May be worth experimenting.
Re: RSR new layout.
Posted: Mon Sep 13, 2021 11:06 am
by bulleidboy
Steve - isn't "chicken batter" a bit gooey for ballasting

Re: RSR new layout.
Posted: Mon Sep 13, 2021 12:02 pm
by Bandit Mick
It can make a fowl mess!
Re: RSR new layout.
Posted: Mon Sep 13, 2021 12:51 pm
by Steve M
bulleidboy wrote: ↑Mon Sep 13, 2021 11:06 am
Steve - isn't "chicken batter" a bit gooey for ballasting
BASTER - bl@@dy spellchecker

.