Page 3 of 11
Re: South Auckland Junction
Posted: Sun Jan 27, 2019 10:11 am
by JohnSmithUK
IanS wrote: ↑Fri Jan 25, 2019 4:09 pm
I have found that one single straight (as in top left) isn't enough to get a loco plus wagon. 1 1/2 may be enough depending on the loco.
The plan is to put some track into the tunnel entrance, gaining a couple of extra inches at each end, hopefully that will be enough, or failing that, using the runaround and creative use of isolating sections.
Re: South Auckland Junction
Posted: Sun Jan 27, 2019 12:14 pm
by Bandit Mick
A good plan coming together there JS. Nice to see lots of people proving it can be done in a small space. I use wire in tube - model aircraft wire with a corresponding plastic tube. A bit more expensive perhaps and I keep it straight but is a simple method that works without fail - plus the wire is a great fit in the points - just needs bending then the surplus at the end cut off carefully with a Dremel.
Re: South Auckland Junction
Posted: Sun Jan 27, 2019 12:22 pm
by glencairn
A simple plan coming along nicely. I like it. Keep us posted.
Glencairn
Re: South Auckland Junction
Posted: Sun Jan 27, 2019 1:10 pm
by JohnSmithUK
Some more rolling stock is on it's way from the good ship eBay.
Re: South Auckland Junction
Posted: Mon Jan 28, 2019 4:46 pm
by JohnSmithUK
Using some new toys, I have been experimenting with my point control.
It seems to be a success so far.
Re: South Auckland Junction
Posted: Tue Jan 29, 2019 4:10 pm
by JohnSmithUK
As a side effect of creating a lot of mess, the prototype for the point control holder is underway.
Re: South Auckland Junction
Posted: Fri Feb 01, 2019 12:05 pm
by JohnSmithUK
My wagons arrived unscathed by their journey.
Less than £20 including postage.
Will no doubt attack them to make more suited to my theoretical area at some point.
Re: South Auckland Junction
Posted: Wed Feb 06, 2019 11:17 am
by JohnSmithUK
Sometimes you can see the wood for the trees. Almost literally in this case.
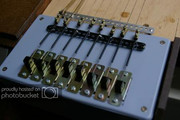
Making the panel/box for my point control seemed easy enough to make a channel in some softwood I had lying around.
It finally hits me this morning the gap I need for the switches is within 1/32" of the width of the shortside of the wood itself.
So realising a better and easier method is available, I present this.
It is still a trial and for testing only, but already is better than my previous efforts.
Re: South Auckland Junction
Posted: Wed Feb 06, 2019 9:17 pm
by Steve M
John, found this on t’internet - you may find it helpful. The original poster of this used the innards from a chocbloc to enable adjustment of the wire.

Re: South Auckland Junction
Posted: Thu Feb 07, 2019 8:54 am
by JohnSmithUK
Steve M wrote: ↑Wed Feb 06, 2019 9:17 pm
John, found this on t’internet - you may find it helpful. The original poster of this used the innards from a chocbloc to enable adjustment of the wire.

That looks brilliant and the tensioner so simple.
