Brewtown
Re: Brewtown
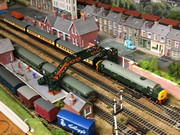
Finally completed my new control panel, a bit of hassle with the wiring > good job I marked each pair of wires to the 43 sets of points! , but still had to spend a couple of hours making sure each point operated as required.
Now to complete the wiring of the point motors on the new goods yard extension.
Next little project is to replace the grain of wheat bulbs with LEDs in the buildings.
Is there no end to this railway modelling
Now to complete the wiring of the point motors on the new goods yard extension.
Next little project is to replace the grain of wheat bulbs with LEDs in the buildings.
Is there no end to this railway modelling
Forfarian aka Tim
Of course I talk to myself, I sometimes need expert advice!
Re: Brewtown
Finally got round to sorting out the lift up access panel! I got fed up with jumping wagons and the odd derailment at the track breaks.
I ordered 3 new lengths of flexi track from Widnes, 1 mtr of 12mm x 1.5mm copper strip and 6 cabinet dowels from the Bay.
Ripped up the old track either side of the joins, fitted the cabinate dowels, relaid the track. I drilled 50mm pieces of the copper strip with 4 x.9 mm holes and fitted it under the track at the joins with track pins. removed the track for dropper wire fitting and cutting the 50 mm copper sleepers in the centre with the Dremel. Re fitted the 3 sections of track and soldered to the copper sleeper, finally slitting the track and cleaning the edges. Connect the droppers and Bobs ur Uncle it works a treat.
Why the hell didn't i do this when i first place !!. A frustration removed in two days
Forfarian aka Tim
Of course I talk to myself, I sometimes need expert advice!
Re: Brewtown
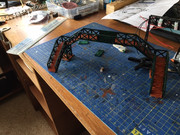
My latest bit of construction work, a replacement for the cardboard bridge at the station.
I've been enjoying a bit of extra time on my layout lately, getting the chance to run my 6 class 37s with all the sounds on!
Still plenty to keep me occupied i have 3 Dapol bridge kits and 3 signal gantry kits to go at!
Stay safe everyone
Forfarian aka Tim
Of course I talk to myself, I sometimes need expert advice!
Re: Brewtown
The footbridge in position, much better than the previous card one, also a good clean up of the rail room.
I did find time to change from steam to diesel today, brought out the Class 66 and Deltic, gave my 03 a good run in on the rolling rd.
i was going to put a stay alive in my Sentinal, but i don't think my hands are steady enough to solder decoders!!!! is there any way to fit one without soldering a decoder??
So back to building gantrys and bridges
Forfarian aka Tim
Of course I talk to myself, I sometimes need expert advice!
Re: Brewtown
Hi
If you use LaisDcc decoders, they have a purple and black wire attached to theie decoders that are for the fitting of stay alive.
Their web site is https.//laisdcc.com. bnb
If you use LaisDcc decoders, they have a purple and black wire attached to theie decoders that are for the fitting of stay alive.
Their web site is https.//laisdcc.com. bnb
Re: Brewtown
Gantry looks great and works well. You can increase the LEDs series resistors Ohm value or add a second resistor in series with the first one to reduce brightness.
Purely as an observation, there would never be a semaphore signal in front of a colour light signal as seen in the pIc. Plus of course the semaphore is showing both diverging lines as a proceed. Disaster awaits!!
Re: Brewtown
BrianBrian wrote: ↑Mon Apr 20, 2020 6:27 pm Gantry looks great and works well. You can increase the LEDs series resistors Ohm value or add a second resistor in series with the first one to reduce brightness.
Purely as an observation, there would never be a semaphore signal in front of a colour light signal as seen in the pIc. Plus of course the semaphore is showing both diverging lines as a proceed. Disaster awaits!!
The next stage is to model the semaphore signals being dismantled as part of the ongoing con version.
The existing resistors are inbuilt and sealed, but I can easily add another one at the supply connections.Thanks for the comments.
Forfarian aka Tim
Of course I talk to myself, I sometimes need expert advice!
Re: Brewtown
Nice idea. How about setting the three arms to danger (Horizontal) and glue small white (plastic or card strips) onto the front of each arm in a X shape. Denotes 'signal arm not in work'
Who is online
Users browsing this forum: Ahrefs [Bot], Google [Bot], Steve M and 2 guests