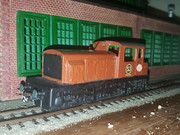
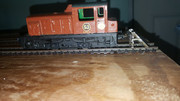
I'm making some changes in the plan on how I'm going to rebuild the railway, once I get there...
Before I can do anything, I've decided that I'm going to need a new, slightly bigger shed. I'm hoping for an 8'x6', with the door on the end, as normal. Around 3 sides will be a worksurface/baseboard at 1m high (lower than the current railway), with shelves at sensible heights above and below. The railway will be run on the back and right hand walls as you walk in, in a similar configuration to the current shed. The left hand worksurface will become a general use work bench.
As for the railway itself, I'm going to build it in smaller sections, aiming each section to have a good amount of scenery and detail, and will be protected from the outside elements by a hard cover. This won't prevent all the damage by the conditions but should stop most. The scenic areas will be connected together by very bland railway lines, which will have little in the way of features that can be damaged by the weather, with the connection between the two being a tunnel portal or similar.
The scenic areas will no longer be flat boards, There will be a lower frame of thick ply, which will carry a very thin layer of ply on supports to carry the track. This will make it simpler to vary the height of certain areas of the layout.
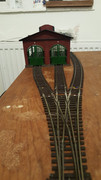
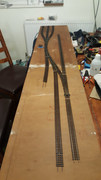
Here is a picture of the first scenic board, in the planning stage...
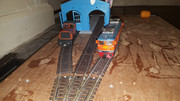
Quarry Hill Railway
Re: Quarry Hill Railway
finially got some actual progress to report!
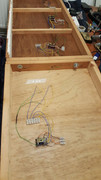
The rebuilding of the fiddle yard shed is on hold for now, so i've started on the first scenic board. I've been taking a few evenings to prep pooints and motors ready for fitting, and have spent the day getting it all on the baseboard.
everything is wired up to local terminal block, ready for the loom to the control panel to go in. for now, i'll use some spare dsub connectors, so things are easy to put away.
i'm going to use this as a shed layout indoors for now to give me something I can tinker with, and practise some scenic work.
Father, IT Guy, HO/OO Modeler.
Re: Quarry Hill Railway
managed to move on a bit more with the layout.
all the track that will not be connected to a section thqt heads off board has been fixed down, all the trackfeeds are in place and wired up back to the control panel. all the frog switching has been done also.
Had a minor issue with the 3 way point. i've wired it up so the pointblades are fed from the frog rather than relying on the baldes touching the rails, however i missed two joining wires with ended up shorting the controller out. They've now been snipped and isolated so the point works perfectly now.
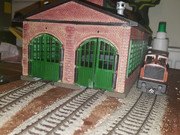
I've also done something I've never managed before... ballasting. Not attempted this in the past but fairly pleased. only issue is minor cracking... but I'm wondering if its either i've had too strong or weak a pva mix, or the pva is very old...
lastly i scratch built a bufferstop from some old rail and sleeper i had in stock... what do you think??
Father, IT Guy, HO/OO Modeler.
-
- Posts: 908
- Joined: Thu Oct 04, 2018 7:42 pm
- Contact:
Who is online
Users browsing this forum: No registered users and 0 guests