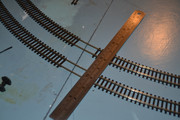
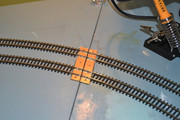
Sandy Hills The new layout
Re: Sandy Hills The new layout
Hi JSA
Here is a picture of a mock up of the other side of my lifting section which I will be doing next. If your angles are simlar to mine there should not be a problem using the PCB and solder method. just cut the sleepers out at an angle.
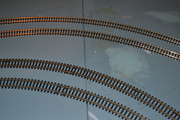
Sandy
Re: Sandy Hills The new layout
I would add a lesson I learnt the hard way regarding tracks crossing a joint at an angle.
I found that cutting the rails with a dremel, square to the board joint, would occasionally cause derailments. I t took a while to realise that certain angles of cut left the cut 'open' to the wheel flange, with the result that they would act much like the frog on a set of points.
But by cutting the rail at an oblique angle so that the long edge of the cut pointed in the direction of travel of the stock, any derailments were eliminated.
In this quick sketch the red line is the cut in the rail so the long edge protects the gap from the wheel flange. Imagine now the cut is along the thin black line and you can see the gap is open to the flange.
"Not very stable, but incredibly versatile."
Re: Sandy Hills The new layout
Hi Steve. Thanks for that. Have today laid one of the main lines over the flap. I see what you mean I will do strait cut as you said. .
Sandy
Re: Sandy Hills The new layout
I have never had a problem on any across baseboard join - Curved or straight track!
The main things are .. Ensure the track is soldered into position BEFORE cutting anything. Curved track is soldiered to copper clad sleeper strips or brass countersunk wood screws and only then cut with a razor saw directly over the join between the two baseboards. Do not use a Dremel or other cutting medium, other than a razor saw!
- Walkingthedog
- Posts: 4972
- Joined: Thu Oct 04, 2018 5:51 pm
- Location: HAZLEMERE, BUCKS.
- Contact:
Re: Sandy Hills The new layout
Same here Brian. On my old layout I had a double track and a set of points on the lift out section so at one end 3 tracks crossed the gap all at an angle.
Nurse, the screens!
Re: Sandy Hills The new layout
Maybe it’s because my layouts are in a large wooden shed where temperature and humidity can vary over quite a wide range, but I find that my joints have a tendency to shift - even though I use locating dowels, through bolts, over centre catches etc to keep everything as stable as possible.
I found that cutting the rails at a closed angle alleviated any running issues on the lift out section and minimised any variation due to temperature and humidity.
"Not very stable, but incredibly versatile."
Re: Sandy Hills The new layout
Have done it now Brian before I saw your advice. Have tested it with rolling stock and all seems to be well.. I dont have a razor saw so I used Dremel with very fine cutting disc.
Not isolated the track yet, do it tomorrow.
Sandy
Re: Sandy Hills The new layout
Hi Sandy,
Don't forget that with Copper Clad you must make three cuts, as shown by the red lines, cutting right through the copper to just expose the paxillin or SRB material underneath or you'll have a full short circuit occur!
Re: Sandy Hills The new layout
Thanks Briam but if you notice my post yesterday under the picture, I said not isolated track yet will do it tomorrow. Done it now.
Last edited by sandy on Sat Jan 01, 2022 11:51 pm, edited 1 time in total.
Sandy
Re: Sandy Hills The new layout
I agree with you about the ballast. I wish I had got darker granit ballast instead of the limestone that means I have more work making it dirty.Jsa274 wrote: ↑Tue Dec 28, 2021 6:54 pm Looks really good, nice work!
I have a hinged layout, but it is made more complicated by track crossing the join at an angle.
I’m not at the ballasting stage yet but I personally think a darker hue is more fitting. especially if running steam engines or in areas where diesels would spend a lot of time static, such as fuel points, sheds, or near the end of platforms.
Sandy
Who is online
Users browsing this forum: No registered users and 1 guest